
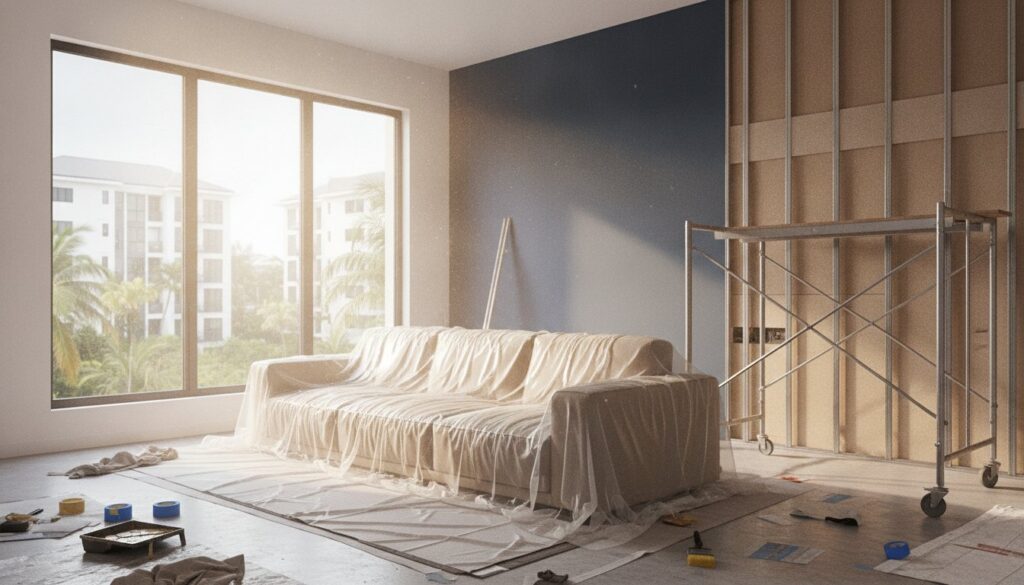
What if the biggest threat to your home renovation isn’t the contractor’s skill, but the microscopic dust particles currently settling into your leather sofa? Most homeowners assume a few old bedsheets are enough, but protecting furniture during renovation requires a technical approach to prevent hacking dust from penetrating every crevice. We understand the anxiety of watching heavy tools move around your existing furniture in a cramped BTO or resale flat. It’s a valid concern; even a minor slip can lead to permanent scratches or costly repairs that your initial budget didn’t account for.
This guide provides the technical “seal and shield” strategies that professional contractors use to keep your home assets safe. You’ll learn the exact materials required, such as industrial-grade stretch film and corrugated cardboard rolls, to keep your belongings dust-free and damage-proof. We’ll also cover how to manage space effectively during the work process to avoid accidental impacts. By following this straightforward approach, you can ensure zero damage to your items and significantly reduce the time spent on post-renovation cleaning.
Key Takeaways
- Understand why standard covers like old bedsheets fail against fine silica dust and why you need non-porous barriers to prevent permanent damage.
- Learn the “Central Island” method and other technical strategies for protecting furniture during renovation in space-constrained HDB or Condo units.
- Discover the specific material list used by professionals, including the required micron thickness for PE sheeting and the benefits of heavy-duty canvas.
- Get step-by-step instructions for shielding high-value items, including breathable wrapping techniques for leather sofas and scratch protection for wood.
- Find out how engaging a direct contractor ensures professional site management that minimizes airborne dust and meets strict local regulatory standards.
The Reality of Renovation Dust: Why Standard Covers Fail
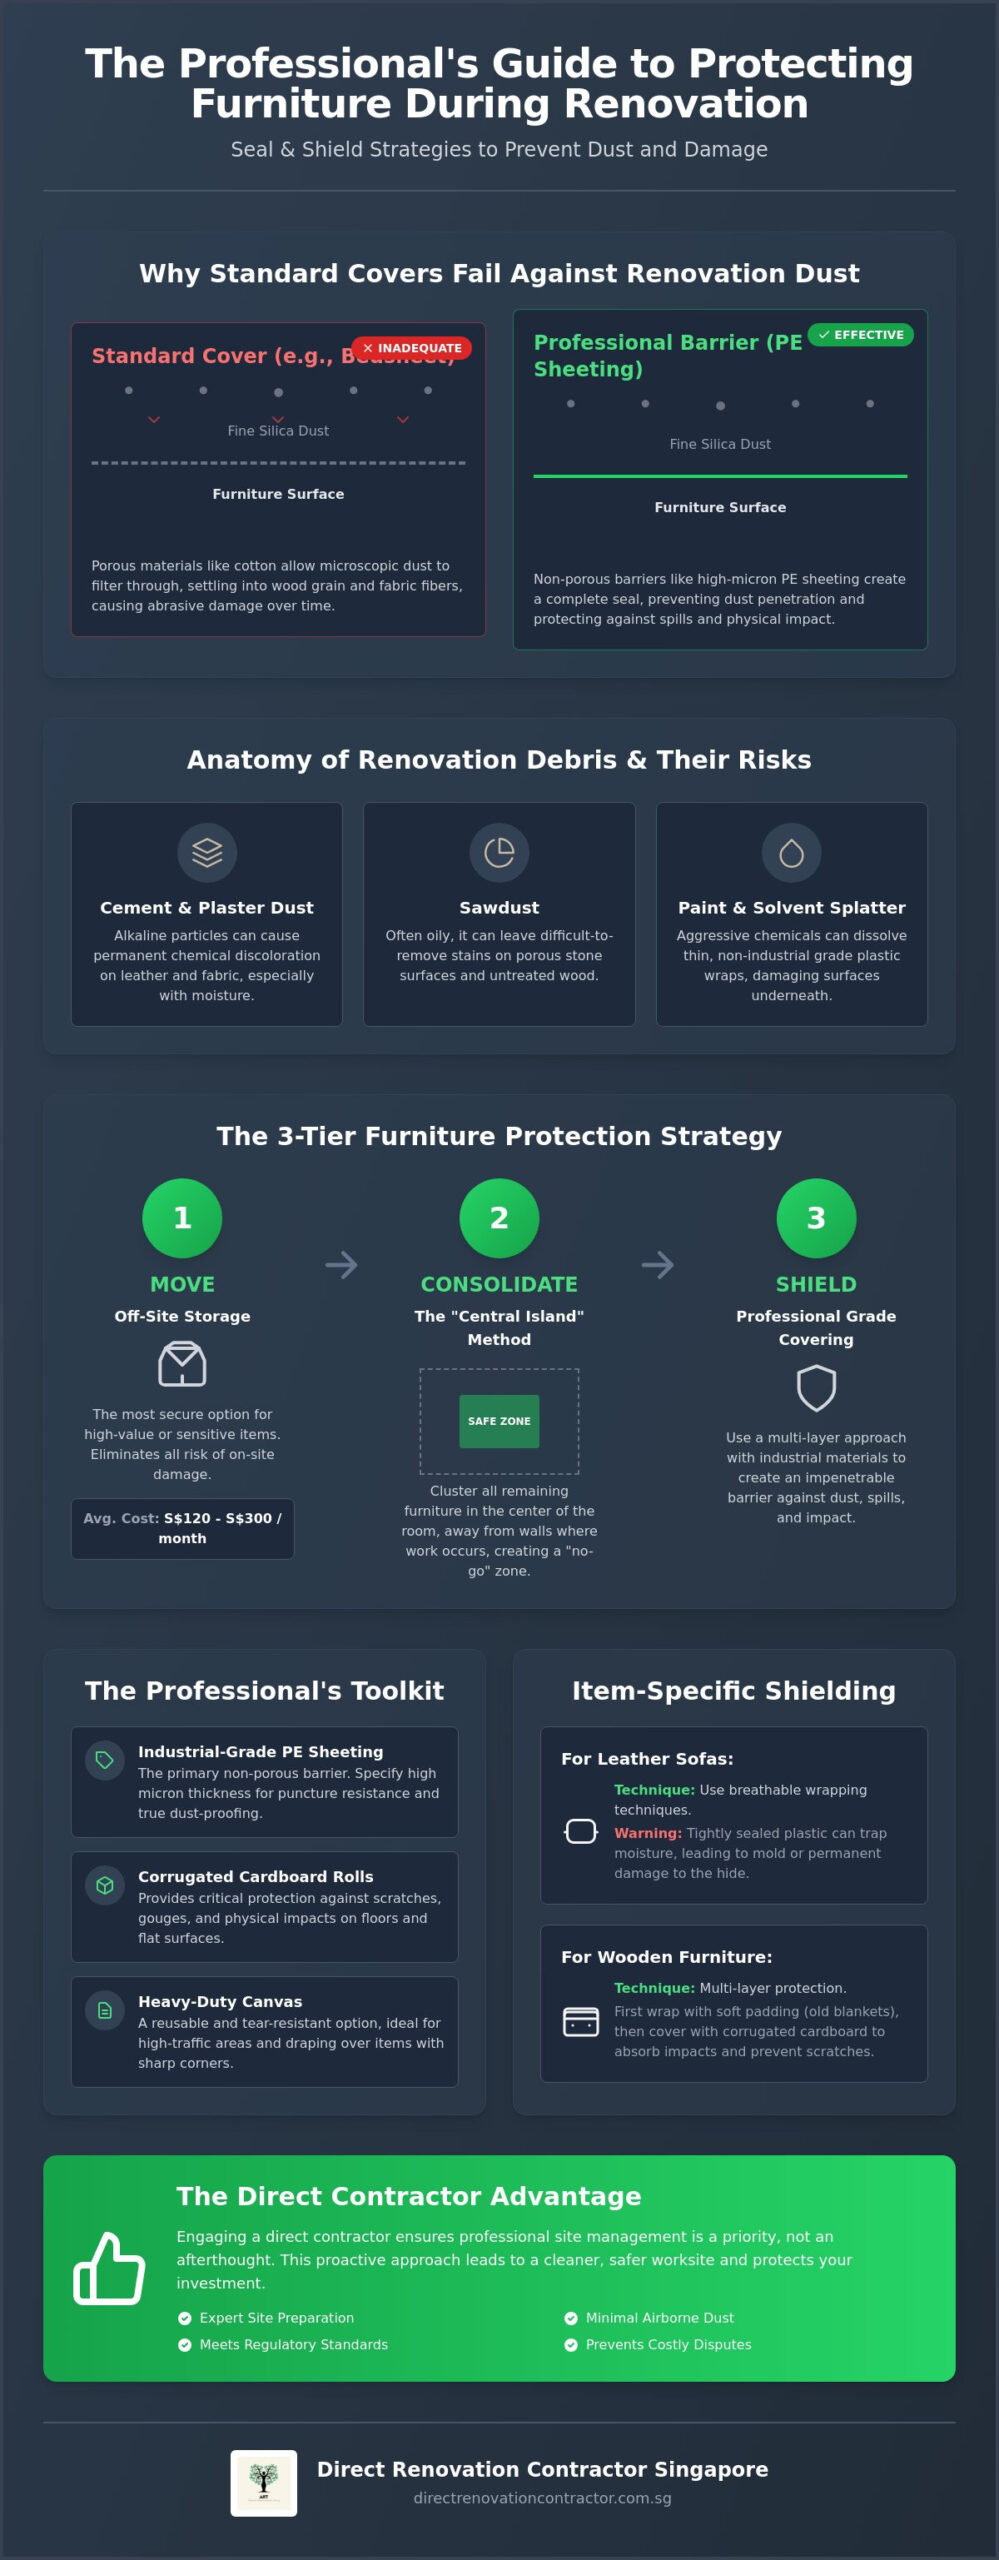
Many homeowners believe that throwing an old bedsheet over their dining table is sufficient for protecting furniture during renovation. This is a technical mistake. When we perform hacking and masonry works in an HDB flat, the process generates high concentrations of airborne silica particles. These particles are significantly smaller than the gaps in the weave of standard cotton fabrics. Dust doesn’t just sit on top of a porous sheet; it filters through the material and settles directly into the grain of your wood or the fibers of your sofa. Once these particles settle, they act as an abrasive, grinding against surfaces every time the item is touched or moved.
You must distinguish between surface contamination and impact damage. While dust is a nuisance, physical impacts from heavy tools or falling debris can cause structural harm. A thin cloth offers zero resistance if a stray hammer or a piece of hacked tile strikes your furniture. Furthermore, moving items during a BTO or resale project often involves tight corridors. Without rigid shielding, you risk deep gouges that require professional furniture conservation and restoration to fix. Protecting furniture during renovation isn’t just about keeping things clean; it’s about creating a physical buffer against the chaotic environment of a live worksite.
The Anatomy of Renovation Debris
Different renovation stages produce different types of waste, each with unique risks. Understanding these helps you choose the right barrier:
- Cement and Plaster Dust: These are alkaline and can chemically react with leather or fabric, causing permanent discolouration if moisture is present.
- Sawdust: While larger than silica, it’s often oily and can stain porous stone or untreated wood.
- Paint and Solvent Splatter: These can eat through thin plastic wraps if they aren’t industrial grade.
Fine dust is the primary enemy of electronics and mechanical parts. It enters cooling vents and settles on circuit boards, leading to overheating or short circuits. It also clogs the hinges and drawer slides of your custom carpentry, causing them to grind and wear out prematurely.
The Cost of Inadequate Protection
The Strategy: Move, Consolidate, or Shield?
Before the first wall is hacked, you must decide which items stay and which items go. Protecting furniture during renovation requires a logistical strategy that accounts for the specific layout of your Singapore home. For high-value antiques or sensitive electronics, off-site storage is the most secure option. A medium-sized storage unit in Singapore typically costs between S$120 and S$300 per month. If your budget allows, this expense eliminates the risk of damage entirely by removing the items from the environment.
If items must remain on-site, use the “Central Island” method. Cluster your furniture in the middle of the room, far from the walls where hacking and drilling will occur. This creates a “No-Go Zone” for workers and tools, reducing the chance of accidental scratches. During multi-stage renovations in occupied homes, this consolidation allows you to move the “island” from room to room as the project progresses. This approach is a standard part of our HDB BTO renovation packages where space is often at a premium.
Creating a Safe Zone
Sealing the workspace is non-negotiable. You can isolate specific rooms using heavy-duty plastic sheeting and industrial zippers. This prevents fine particulate matter from migrating to clean areas of the house. You must also manage your airflow. Turn off the air conditioning and seal all vents in the active work zone with tape and plastic. To Set up Safely, ensure the plastic barrier is taped securely to the floor and ceiling. For more on coordinating these technical phases, read our guide on Home Renovation in Singapore.
Inventory and Assessment
Take high-resolution photos of every piece of furniture before work begins. This documentation is your only protection if a dispute regarding damage arises later. Categorise your items by their sensitivity. Electronics and fabric upholstery need airtight seals, while solid wood requires impact protection. Be pragmatic. If an item is near the end of its lifespan, it might be cheaper to replace it than to pay for the materials and labour required for protecting furniture during renovation. This clear-eyed assessment ensures your renovation funds are spent on high-quality masonry and carpentry rather than unnecessary logistics.
Essential Materials for Protecting Furniture During Renovation
Selecting the right materials is a technical requirement, not a suggestion. Protecting furniture during renovation involves more than just a single layer of plastic. You need a combination of barriers to address different threats like fine dust, moisture, and physical impact. Using the wrong material, such as thin cling wrap or cheap masking tape, can actually cause more harm than good by trapping moisture or leaving behind a sticky adhesive residue that ruins furniture finishes.
Polyethylene (PE) sheeting is your primary defense against dust. For light renovation, 50-micron thickness is acceptable. However, for heavy hacking works in HDB or Condo units, we recommend 100 to 150-micron sheeting. It’s tear-resistant and provides a reliable seal when taped correctly. While plastic blocks dust, canvas drop cloths are the professional choice for floors and heavy furniture. Canvas is durable and, unlike plastic, it isn’t slippery. This makes it safer for workers moving around your home. It also absorbs minor paint spills rather than letting them pool and run off onto your belongings.
For tabletops and delicate surfaces, use corrugated plastic sheets, often called hollow boards or PP boards. These provide a rigid buffer against impact damage. If a tool is dropped on a table protected only by plastic, it will still dent the wood. A hollow board distributes the force, keeping the surface intact. Avoid applying adhesive tapes directly to furniture finishes. Varnish and lacquer can peel when the tape is removed. Instead, wrap the item in industrial shrink wrap first. This material sticks only to itself. You can then apply tape to the outside of the plastic layer to secure your protective sheets safely.
The Hierarchy of Protection Materials
Effective shielding follows a layered approach. Use moving blankets or soft fleece as a base layer for high-polish wood. This prevents micro-scratches from dust particles that might be trapped underneath. The outer layer should be a non-porous PE sheet to block moisture and fine masonry dust. Fasten the edges with low-tack masking tape, ensuring the tape only touches the plastic or the floor, never the furniture itself. This method is the most reliable way of protecting furniture during renovation without risking chemical damage to the items.
Where to Source Contractor-Grade Supplies
Retail hardware stores are convenient for small projects, but they are expensive for full-scale renovations. Buy in bulk from industrial suppliers in local areas like Ubi or Defu Lane to save on costs. A roll of corrugated cardboard or a 12kg roll of stretch film is significantly cheaper when sourced directly. Most professional contractors include floor protection for common areas and work zones as a standard part of their service. If you need additional furniture shielding, ask your contractor to supply extra materials at cost. You can often reuse these heavy-duty materials for future DIY painting or maintenance projects.
Step-by-Step Guide to Shielding Specific Items
Knowing which materials to use is only half the battle. The actual process of protecting furniture during renovation requires a systematic application of these barriers to ensure no gaps are left for dust to enter. Different surfaces react differently to environmental stress. While a wooden table needs impact resistance, a fabric sofa requires a barrier that prevents microscopic dust from embedding into the weave. Following a structured checklist for each item type prevents common mistakes that lead to permanent damage.
Upholstery and Soft Furnishings
Never wrap a sofa in plastic immediately. You must vacuum the piece thoroughly first to remove existing grit and allergens. If you trap these particles under a tight seal, they can cause abrasions or trigger mould growth. Use the “Breathable Wrap” technique: cover the item with a clean moving blanket or soft fleece as a base layer. This absorbs any residual moisture. Only then should you apply the outer plastic layer. In Singapore’s high humidity, sealing fabric or leather directly in plastic for weeks can trap heat and lead to mould. The fabric base layer provides the necessary buffer to keep the material in good condition.
Hard Surfaces and Carpentry
Wooden dining tables are prone to scratches and heat damage if workers use them as temporary workbenches. Cover the surface with a layer of felt, followed by a hollow board cut to size. This rigid layer protects against tool impacts. If you have existing custom carpentry that isn’t being replaced, you must shield the edges. Edge protection refers to the installation of rigid buffers, such as thick cardboard or plastic corner guards, to shield the most vulnerable parts of furniture from impact damage. For marble or quartz countertops, use corrugated plastic sheets taped securely at the seams to prevent liquids or cement dust from reaching the stone.
Electronics and kitchen appliances need airtight seals. Fine masonry dust can settle on internal cooling fans and motherboards, causing hardware failure months after the renovation is finished. Unplug all devices and wrap them tightly in industrial stretch film. Ensure the film covers all ports and vents completely. For larger appliances like refrigerators that must remain plugged in, consult your contractor about creating a ventilated plastic “tent” that allows for airflow while blocking falling debris. If you are planning a major overhaul, our HDB resale renovation packages include professional site protection as a standard procedure to safeguard your home assets.
The Direct Contractor Advantage: Professional Site Management
A direct contractor’s hands-on involvement is the best insurance for your property. Unlike firms that outsource labor, a direct team coordinates hacking and demolition works with a focus on containment. We understand the physics of dust migration and use hoarding to create airtight work zones. Hoarding involves temporary partitions that physically separate the construction area from the rest of your home. This is essential for protecting furniture during renovation, especially in occupied units where you can’t move everything out. By sealing the active work zone, we ensure that fine masonry particles don’t drift into your bedrooms or kitchen cabinets.
Our approach follows strict local standards. For HDB projects, we adhere to the Directory of Renovation Contractors (DRC) guidelines, ensuring debris is disposed of correctly to prevent secondary dust clouds. In condominiums, we manage the required MCST renovation deposit, which typically ranges from S$2,000 to S$5,000. This deposit is at risk if common areas or your existing fixtures aren’t protected properly. We take responsibility for the entire site, from the lift lobby to your living room, ensuring that every transit path is shielded from heavy tool impacts and debris.
Contractor-Led Protection Standards
Before any heavy tools enter the unit, we install professional-grade floor and wall protection. This isn’t just about the work zone; it’s about the transit path. We use a combination of heavy-duty cardboard and plastic to shield your vinyl or tile flooring from impact. For a deeper look at how we maintain these benchmarks, see our Direct Renovation Contractor Singapore comparison guide. Managing the removal of debris is also part of our daily routine. We don’t let bags of hacking waste sit and accumulate dust. We remove them in a controlled manner to keep the air quality manageable for your remaining furniture.
Communication and Accountability
Transparency is the core of our business model. Your renovation contract should explicitly state the site preparation standards. We implement daily “dust-down” routines where the team cleans the perimeter of the work zone to prevent tracking grit into clean areas. This level of site management is why our pricing is straightforward; we include professional site prep in our initial quotes rather than adding it as a hidden fee later. If you want a partner who values technical skill and straightforward communication, get a direct quote for your renovation and site prep today. We handle the technical details of protecting furniture during renovation so you can focus on the final results.
Secure Your Home Assets Before Work Begins
Successful site preparation’s the foundation of a stress-free home improvement project. You’ve now got a technical framework for protecting furniture during renovation, from selecting the correct micron thickness for plastic sheeting to implementing the “Breathable Wrap” technique for leather upholstery. By moving beyond simple cloth covers and adopting industrial shielding methods, you’ll prevent the permanent damage caused by silica dust and mechanical impacts. These proactive steps ensure your belongings remain in showroom condition while your HDB or Condo undergoes its transformation.
Choosing a partner who understands the nuances of local site management is just as critical. We provide direct-to-homeowner pricing with no ID markups, ensuring your budget goes toward high-quality materials and skilled labor rather than intermediary commissions. Our expert custom carpentry and masonry teams are specialized in HDB and Condo site management, prioritizing technical competence and transparent communication at every stage. Save on your renovation by working directly with our expert team and enjoy the peace of mind that comes with professional site oversight. Your dream home’s within reach, and with the right protection in place, your existing assets will be ready for the big reveal.
Frequently Asked Questions
Can I stay in my HDB flat while it is being renovated?
Yes, staying in your HDB flat during renovation is possible but highly discouraged for major works. The fine dust and noise from hacking are intense. Since HDB noisy works are limited to 9:00 am to 5:00 pm on weekdays, your home becomes a construction site for eight hours a day. If you must stay, ensure you have a fully sealed clean zone where no work occurs.
How do I protect my mattress from renovation dust?
You should use a heavy-duty, 100-micron polyethylene mattress bag for maximum protection. Standard retail plastic is often too thin and punctures easily when moved. Slide the mattress into the bag and seal the opening with industrial-grade tape. This airtight seal is the only way to prevent microscopic silica dust from settling deep into the mattress fibers during heavy masonry works.
Will plastic wrap damage my leather sofa in Singapore’s heat?
Directly wrapping leather in plastic can cause permanent damage due to trapped humidity. Singapore’s heat causes moisture to condense under the plastic, which leads to mold growth on the hide. Always use a breathable layer, like a cotton moving blanket, as a base. Only then should you apply the outer plastic layer for protecting furniture during renovation to ensure proper moisture management.
What is the best tape to use on furniture that won’t leave residue?
Low-tack masking tape or specialized painter’s tape is the safest choice for renovation projects. However, you should never apply any adhesive directly to varnished wood or polished stone. The heat can cause the adhesive to bond permanently or peel the finish. Instead, wrap the item in stretch film first and apply the tape only to the plastic layers to secure them.
Do contractors usually provide furniture protection services?
Most direct contractors include floor protection and common area shielding as a standard part of their package. Protecting furniture during renovation is typically the homeowner’s responsibility unless you specifically request it as a paid add-on. We recommend clarifying these boundaries in your contract before work begins to ensure all high-value items are professionally shielded by the on-site team.
How do I protect my kitchen cabinets if I am only renovating the floor?
Seal the cabinet doors with 50-micron PE sheeting and apply hollow boards to the base kickplates. Since floor hacking creates upward dust clouds, you must ensure the gap between the cabinet and the floor is completely airtight. This prevents fine debris from entering your storage areas. Use low-tack tape to secure the plastic without damaging the cabinet laminate or paint finish.
What should I do with my air conditioner during a dusty renovation?
Turn off the air conditioning system completely and seal the indoor units with plastic wrap and tape. Never run the AC during dusty works, as the intake will pull fine masonry particles into the internal cooling coils and motor. This leads to mechanical failure or expensive professional cleaning. Keep the units sealed until the final post-renovation dust-down is completed.
Is it better to move furniture to the centre of the room or against the walls?
It is always better to move furniture to the center of the room using the Central Island method. Most hacking, drilling, and electrical wiring works occur along the walls. Placing items in the center creates a safety buffer that reduces the risk of accidental tool impacts. It also provides contractors with the necessary clearance to work efficiently without constantly shifting your belongings.