
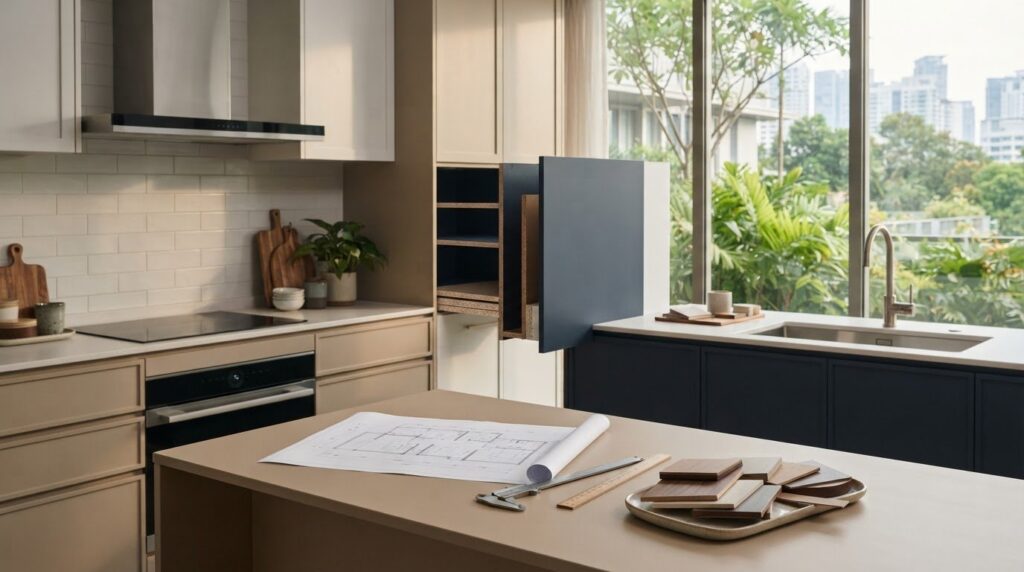
The cabinet finish you notice first may matter less than the material underneath it. For effective material selection for kitchen carpentry, look beyond colour and texture: consider where moisture, heat and daily wear will affect each part of the cabinet. A polished surface can hide important differences in construction, so it helps to compare the core and finish separately.
This guide explains how cabinet cores and surface finishes work together, then shows how to weigh options against your kitchen’s exposure, cleaning routine and intended use. You’ll learn what to consider near sinks and cooking areas, and how to make choices that fit your priorities without assuming one material suits every project. We’ll also cover how to turn those decisions into a clear specification for custom kitchen cabinet fabrication and installation. Technical drawings can support the planning process, making material choices easier to discuss and follow through from layout to installation.
Key Takeaways
- Compare plywood, MDF and particleboard as cabinet cores by their role, strengths, limitations and care needs.
- Use your kitchen’s exposure, cooking habits and cleaning routine to weigh material trade-offs instead of choosing by appearance alone.
- For material selection for kitchen carpentry, assess the core and visible finish as separate parts of the cabinet specification.
- Map kitchen zones before fabrication, then record the chosen core, finish, cabinet location and upkeep expectations.
- A clear material brief guides custom cabinet fabrication and installation, with project drawings supporting the planning process.
Why material selection for kitchen carpentry matters in Singapore
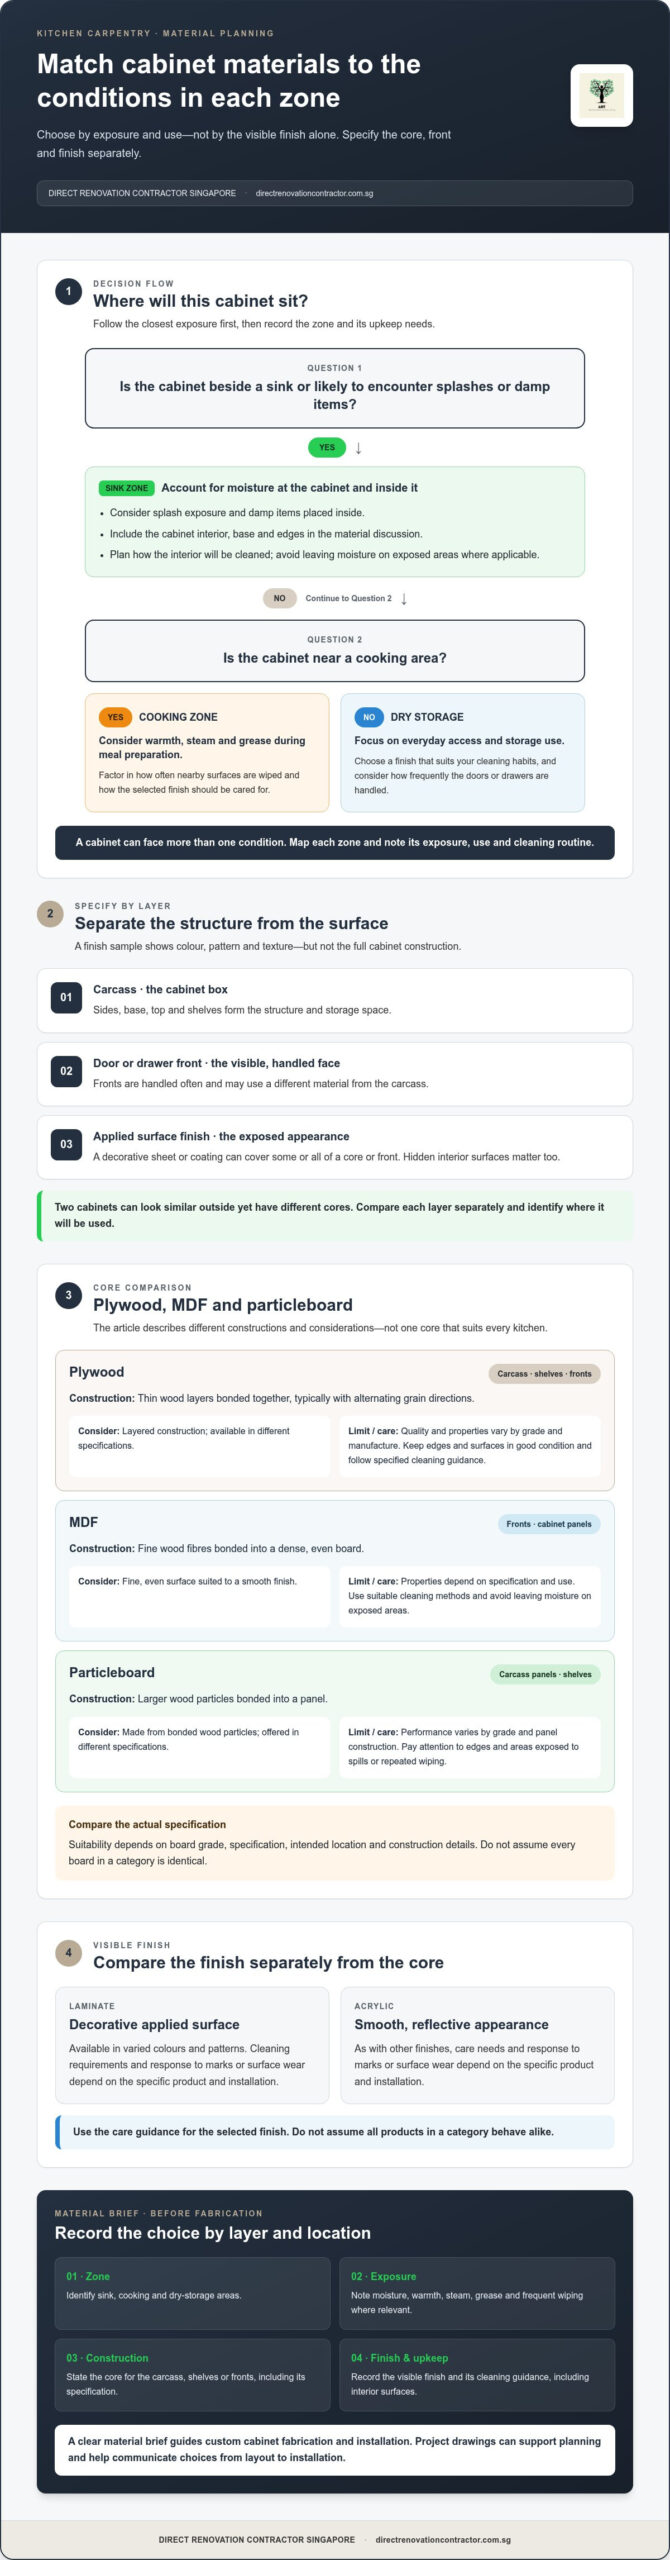
Kitchen cabinets have to meet several demands at once: suit the room, cope with moisture exposure, handle daily use and stay practical to maintain. In Singapore’s humid setting, a cabinet beside a sink may face repeated splashes, while one near a cooking area may be exposed to warmth, steam and frequent cleaning. Dry-storage cabinets have different demands. Treating the whole kitchen as one uniform environment can lead to choices that look consistent but don’t reflect how each section will be used.
Material selection for kitchen carpentry means choosing the cabinet’s structural core as well as its visible surface. These choices affect different parts of the finished cabinet. A colour or texture sample on its own won’t tell you what the cabinet is made of or how its less-visible surfaces are finished.
What does kitchen cabinet material selection include?
The carcass is the cabinet box, including its sides, base, top and shelves. It provides the structure and storage space. The door or drawer front forms the visible face and is handled often. An applied surface finish, such as a decorative sheet or coating, covers some or all of a core or front. A single cabinet can use different materials across these layers. For a general overview of components and material categories, see Kitchen cabinet construction and materials.
A finish sample helps you judge colour, pattern and texture, but it doesn’t show the carcass material, the construction behind the front or the finish on hidden interior surfaces. Two cabinets can look similar from the outside yet have different cores. To compare them fairly, consider each layer separately and identify where it will be used.
How kitchen conditions affect material decisions
Start by noting what each cabinet zone experiences. Sink-side units may encounter splashes or damp items placed inside. Cabinets near cooking areas can face warmth, steam and grease during meal preparation. Cleaning matters too: frequent wiping can affect a finish over time, depending on the product and care routine. Doors and drawers that are opened repeatedly need practical construction across their fronts, edges and interior components.
Give the cabinet interior attention, even when it’s hidden. Moisture or spills can reach the base and edges inside a unit, while stored cookware and pantry goods add regular contact and handling. A visible finish alone won’t explain how those surfaces are built or what upkeep they need. Include interiors in the material discussion, particularly for units beside the sink or used for frequently accessed items.
- Sink zone: account for splash exposure and how the cabinet interior will be cleaned.
- Cooking zone: consider warmth, steam, grease and how often nearby surfaces are wiped.
- Dry storage: focus on everyday access, storage use and a finish that suits your cleaning habits.
Let each cabinet’s exposure, not just its appearance, guide the material choice. This gives custom kitchen cabinet fabrication and installation a clearer starting point: specify materials by layer and location, then match each choice to how the household uses and maintains that area.
Kitchen cabinet construction: compare the core, front, and finish
A cabinet’s visible surface and underlying board do different jobs. The core forms the carcass or front, while the finish provides the exposed appearance and a surface to clean. Comparing them as separate decisions makes material selection for kitchen carpentry more precise. It also helps you compare like with like instead of assuming a finish sample tells the full construction story.
How plywood, MDF, and particleboard differ as cabinet cores
Plywood is made by bonding thin layers of wood together, typically with the grain direction alternating between layers. MDF is formed from fine wood fibres bonded into a dense, even board; particleboard uses larger wood particles bonded into a panel. Suitability depends on the board’s grade, specification, intended location and construction details. Don’t treat every board in a category as identical or assume one core is best for every kitchen.
| Material | Typical cabinet role | Useful strengths | Limitations | Care considerations |
|---|---|---|---|---|
| Plywood | Carcass, shelves or fronts | Layered construction; available in different specifications | Quality and properties vary by grade and manufacture | Keep edges and surfaces in good condition; follow the specified cleaning guidance |
| MDF | Fronts or cabinet panels | Fine, even surface suited to a smooth finish | Board properties depend on its specification and how it is used | Use suitable cleaning methods and avoid leaving moisture on exposed areas |
| Particleboard | Carcass panels or shelves | Made from bonded wood particles; offered in different specifications | Performance varies by grade and panel construction | Pay attention to edges and areas exposed to spills or repeated wiping |
How laminate, acrylic, and other finishes compare
Laminate is an applied decorative surface available in varied colours and patterns. Acrylic can provide a smooth, reflective appearance. Both are visible finishes, not cabinet cores. Their appearance, cleaning requirements and response to marks or surface wear depend on the specific product and how it is installed. Follow the care guidance for the selected finish rather than assuming all products in a category behave alike.
The core provides the cabinet’s structure; the finish defines its exposed surface, so choose and specify them separately. Record the core and finish as distinct items, including where each will be used. This makes it easier to compare options for a door, shelf or sink-side carcass without relying on a single sample.
Keep countertops in a separate category. Solid surface and sintered stone are worktop options, not cabinet finishes; their suitability depends on the project and how the kitchen will be used. Clear layer-by-layer choices can then carry into custom fabrication. Custom kitchen cabinet carpentry puts those decisions into practice, with technical drawings helping make the planned construction easier to review.
Which kitchen carpentry materials fit different priorities?
There isn’t one material combination that suits every kitchen. A household that cooks daily, wipes cabinets often and uses the sink heavily has different priorities from one that mostly stores dry goods and prefers a particular surface appearance. For practical material selection for kitchen carpentry, match each cabinet zone to its exposure and the level of maintenance you’re prepared to do.
Use the table as a comparison framework, not a fixed prescription. The same core or finish can have different properties depending on its grade, product specification, construction and installation. A material name alone isn’t enough to predict how a finished cabinet will perform.
| Priority or zone | Material considerations | Trade-off to weigh |
|---|---|---|
| Sink-side storage | Consider the core, finish and exposed edges together, along with how the cabinet interior will be cleaned. | Repeated splashes differ from direct or prolonged water contact. Don’t treat any board or finish as waterproof without a supporting specification. |
| Near cooking areas | Consider warmth, steam, grease and the frequency of wiping when comparing finishes and cabinet placement. | A surface that suits the look may need more attentive cleaning or care. |
| Frequent cleaning | Compare the finish’s care instructions and how its sheen, colour and texture show everyday marks. | A highly reflective or very dark surface may make fingerprints or smudges more noticeable, depending on the finish. |
| Dry storage and occasional use | Balance the selected core and finish against storage needs, appearance and intended upkeep. | A premium-sounding material may add little value if its properties don’t match the cabinet’s use. |
Material priorities for sink-side and cooking zones
Near a sink, plan for routine splashes and the possibility of damp items, but distinguish these from a leak or standing water. Heat and steam near cooking areas also make cabinet location relevant. Specify the cabinet’s core, finish and exposed edges for the actual conditions, rather than relying on broad claims that a material is moisture-proof or heat-proof.
Material priorities for low-maintenance and appearance-led kitchens
Laminate and acrylic finishes can create different visual effects, but cleaning needs and visible marks depend on the specific surface. A textured finish may disguise some everyday smudges; a glossy finish can reflect more light while making fingerprints easier to notice. These are practical tendencies, not guarantees. Check the product’s care guidance and weigh the desired colour, sheen and texture against your cleaning routine.
Budget matters too. A high-cost or premium-sounding option isn’t automatically the right choice for every cabinet. Even in projects focused on luxury custom kitchen design, it pays to give greater attention to areas with more exposure, then balance appearance and maintenance preferences elsewhere. This gives each material choice a clear purpose without overbuilding dry, lightly used storage.
How to specify kitchen carpentry materials before fabrication
A useful material specification turns preferences into clear fabrication instructions. It should show where each cabinet sits, what its core and visible surfaces are made from, and what conditions they’ll face. That level of detail stops a finish sample from standing in for a full construction description. It also gives you a fairer basis for comparing quotations because the materials and work scope can be assessed on the same terms.
A practical material specification checklist
Work through the kitchen plan in order, from location to final written record. Tie each material choice to actual cabinet use rather than applying one description to every unit.
- Map the zones. Mark the sink, hob, cooking area, dry storage and any other locations with relevant exposure on the plan. Note where cabinets may encounter splashes, warmth, steam or frequent cleaning.
- List each cabinet location. Identify which units are beside the sink, near cooking areas or intended for dry storage. This connects each material choice to a specific place in the kitchen.
- Specify the layers separately. Record the carcass or core material, then list the material for doors and drawer fronts, followed by the visible finish. Include cabinet interiors and exposed edges where they matter to the project.
- Write down daily care needs. Describe your cleaning routine, preferred appearance and acceptable level of maintenance. For example, note whether you want a surface that is easy to wipe or are comfortable following more specific care instructions.
- Keep the agreed version. Record the selected materials and their locations in the project documentation before fabrication. Drawings and technical documents can connect written choices with the planned cabinet layout.
This checklist makes material selection for kitchen carpentry easier to review: each choice has a location, a purpose and an agreed description.
How to compare material descriptions in renovation quotations
Compare equivalent scope, not just similar-looking samples. One description might name only a door finish, while another details the carcass, fronts, interior surfaces and installation scope. Those aren’t directly comparable. Set the documents side by side and note what each specifies for the core, finish, cabinet location and work included. Record thickness, grade or performance claims only when the project specification states them; don’t infer them from a broad material label or appearance.
For more context on how custom fabrication fits into a carpentry project, use this custom carpentry guide. If you’re planning kitchen carpentry as part of a wider HDB project, the HDB renovation guide covers the broader renovation context. Direct Renovation Contractor Singapore provides custom kitchen cabinet carpentry and installation, with technical drawings and documentation supporting project planning. Plan your kitchen cabinet carpentry around a clear, location-specific material brief.
Plan custom kitchen carpentry with a clear material brief
A useful material brief connects each cabinet choice to its location and purpose. First identify where moisture, heat, frequent handling or regular cleaning may affect the cabinetry. Then specify the core, front and finish separately, compare the practical trade-offs, and record the agreed choices before fabrication. This gives everyone a common reference and reduces the chance that a sample or broad material label is mistaken for a complete specification.
Keep the brief specific but practical. It should translate your household’s priorities into cabinetry, not lock you into a material simply because it sounds premium. Include the relevant cabinet locations and your expectations for appearance and upkeep, then use project drawings and documentation to make the plan easier to review. For homeowners seeking inspiration on tailored layouts and cabinetry, bespoke design studios like Reality Kitchens illustrate how practical planning and custom craftsmanship come together seamlessly.
What to bring into a custom kitchen carpentry discussion
Bring kitchen dimensions or existing drawings, appliance locations and a simple outline of what you plan to store. Note where cabinets sit in relation to the sink and cooking area, and describe how you expect to use each section. If you have finish samples or reference images, use them to explain the appearance you want, not as a substitute for describing the cabinet layers.
- Layout information: dimensions, drawings, appliance positions and the intended use of storage areas.
- Material preferences: the proposed carcass, door and drawer-front materials, plus the visible finish.
- Use and upkeep: areas exposed to moisture or heat, how often you clean, and the maintenance level you’re comfortable with.
- Appearance priorities: preferred colour, sheen or texture, alongside practical concerns about marks or routine care.
Keeping these points together makes it easier to compare the requested layers and spot gaps in the brief. For broader context on how custom fabrication fits into a carpentry project, use this custom carpentry guide.
How direct renovation support fits the material decision
Direct Renovation Contractor Singapore provides custom kitchen cabinet carpentry and installation. Its direct-contractor approach connects the project brief with fabrication without an interior-designer intermediary. This model is intended to avoid middleman fees, while actual project savings depend on the scope and choices made. The company’s DIY-friendly renovation approach also includes 3D drawings and technical documentation, which can help you review how agreed material choices relate to the kitchen layout.
Before fabrication, use that documentation to make the brief clear: identify cabinet locations, state the material layers and record relevant exposure and care expectations. To plan a project-specific specification, explore kitchen renovation and carpentry services and discuss your kitchen carpentry brief with Direct Renovation Contractor Singapore.
Take your material brief into the next planning step
Use your material brief as a practical reference as the kitchen moves from idea to project decisions. Keep it with your layout and note any changes to cabinet locations, appliance positions or intended use. If a choice changes, update the written brief so the agreed specification stays clear. This simple habit keeps material decisions tied to how you’ll use the kitchen, rather than leaving key details to memory.
Good material selection for kitchen carpentry isn’t about choosing the most impressive-sounding option. It’s about making considered choices for your home and documenting them clearly enough to guide custom fabrication. Direct Renovation Contractor Singapore provides custom kitchen cabinet carpentry and installation, supported by a DIY-friendly process that includes 3D drawings and technical documentation. The direct model is designed to avoid intermediary fees, while actual savings depend on the project.
Ready to turn your priorities into a project-specific cabinet brief? Discuss your kitchen carpentry project with Direct Renovation Contractor Singapore. Start with a clear brief to make the next decisions more manageable.
Frequently Asked Questions
What is the best material for kitchen cabinets in Singapore?
There’s no single best material for every Singapore kitchen. The right choice depends on cabinet location, how often you cook, cleaning habits and the specifications of the board and finish. For example, a cabinet storing dry pantry goods may not need the same material priorities as a unit beside a sink. For material selection for kitchen carpentry, compare the complete cabinet construction and care requirements, not just a material name or sample.
Is plywood better than MDF for kitchen cabinet carcasses?
Not automatically. Plywood is built from bonded wood layers, while MDF is made from compressed wood fibres, and each is available in different specifications. Suitability depends on the intended cabinet use, board grade and construction details. When comparing carcass options, look at the specified board and how it will be used, including shelves or panels that may carry stored items. Don’t treat the material category alone as proof of performance.
Can laminate kitchen cabinets handle moisture and daily cleaning?
Laminate can be used as a cabinet surface, but don’t assume every laminate or installation is waterproof. Routine wiping differs from repeated splashing, standing water or moisture reaching an exposed edge. Follow the care instructions for the selected finish, wipe spills promptly and use a cleaning method suited to the product. For a sink-side cabinet, consider how the finish, edges and underlying board are specified together.
What is the difference between a cabinet carcass and a cabinet finish?
The carcass is the cabinet’s box-shaped structure, including its sides, base and shelves. The finish is the exposed surface layer that gives a panel its colour, pattern or sheen. A cabinet can have one material forming the carcass and a different material covering its door fronts. A finish sample tells you about the visible surface, but not the board underneath or the construction of hidden panels.
How do I compare kitchen cabinet materials in a renovation quotation?
Compare quotations by matching the scope and material descriptions line by line. Check whether each one identifies the carcass, door and drawer fronts, finishes, cabinet interiors and installation work. If a quotation names only a finish, it doesn’t describe the full cabinet build. Treat thickness, grade and performance statements as comparable only when they’re written into the specifications. This helps reveal whether two quotations cover the same work and materials.
Does solid wood make a good choice for kitchen cabinets?
Solid wood can suit a kitchen if you value its natural grain and are comfortable with its particular care needs. Wood can respond to changes in moisture and temperature, and its appearance may vary with grain and natural features. Its suitability depends on the wood, construction, cabinet location and finish. Consider whether the look and maintenance fit your household, then compare the specified material with other options for the intended use.
What should I include in a kitchen carpentry material specification?
Record the material for each carcass, door and drawer front, and name the finish separately. Mark cabinet locations on a kitchen plan, including units near the sink and cooking area. Note appliance positions, intended storage, cleaning expectations and appearance preferences. Include any stated board grade, thickness or performance detail rather than relying on assumptions. Keep the final written specification with the drawings so the agreed choices are easy to refer to during fabrication.