
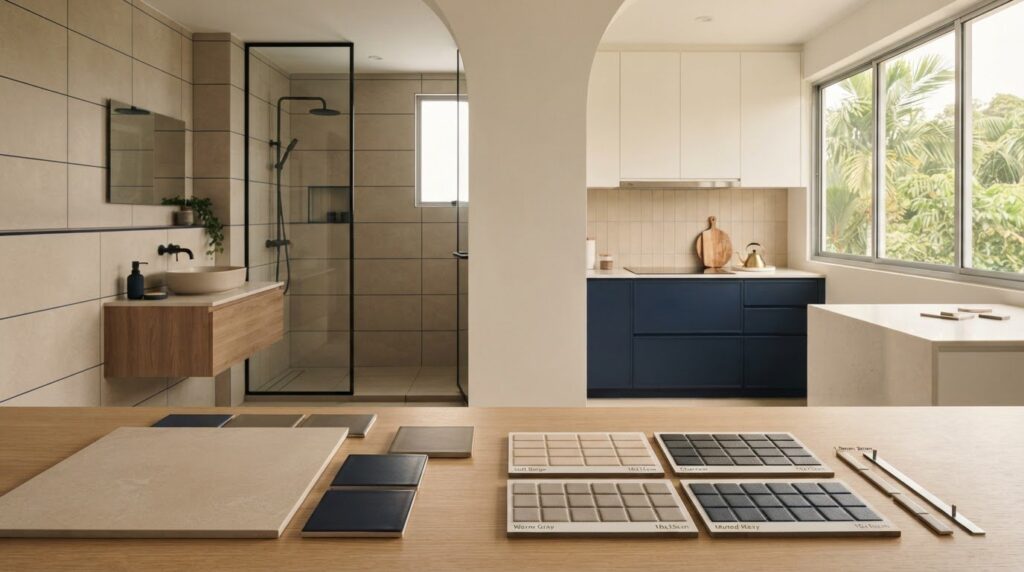
The grout colour that looks best on a sample may not suit the tile, joint width or room. Choosing the right grout for tiles means weighing practical details too, especially in Singapore homes where bathroom and kitchen joints need to cope with regular moisture and cleaning.
It’s reasonable to focus on appearance, but grout type affects maintenance and installation as well. Cement-based grout is a common option, while epoxy grout offers stronger resistance to stains and moisture but can involve different installation considerations. The tile material and joint size also matter: the wrong match can create problems before colour becomes an issue.
This guide compares grout types, colours and joint requirements so you can choose a finish that suits your tiles and the way you use the space. You’ll learn what to consider for delicate surfaces, wider floor joints and wet areas, plus what to confirm with your renovation contractor before tiling work begins. Agree on the grout material, colour, joint width and work scope early, and you’ll have a clearer plan for both the finished look and ongoing upkeep.
Key Takeaways
- Choosing the right grout for tiles starts with the tile material, room conditions and joint width, not colour alone.
- Compare cement-based and epoxy grout by installation needs, cleaning and ongoing care before settling on a type.
- Test shortlisted grout colours against your actual tile; a stronger contrast makes the joint pattern more noticeable.
- Before tiling starts, confirm the grout type, colour, joint size and care instructions with your contractor.
- Clarify who supplies the grout and whether preparation, application and clean-up are included in the tiling work scope.
Choosing the Right Grout for Tiles Starts with What Grout Can, and Cannot, Do
Grout is the material packed into the joints between installed tiles. It creates a finished joint surface and helps limit dirt and debris collecting in the gaps, making routine cleaning more straightforward. It doesn’t bond tiles to the floor or wall, and it doesn’t replace waterproofing beneath the tiled surface. Those jobs belong to different parts of the installation.
Grout fills tile joints. Tile adhesive bonds tiles to the prepared surface. Sealant is a flexible material used where joints need to accommodate movement or changes in plane. Waterproofing is a separate layer or system designed to manage water beneath the tiles.
This distinction matters in bathrooms and other wet areas. Even a grout product described as water-resistant shouldn’t be treated as the waterproofing system. If water gets through joints or around edges, the layers beneath the tiles still need to be correctly specified and installed.
What grout does between ceramic and porcelain tiles
Once ceramic or porcelain tiles are set, grout fills the gaps between them and gives the tiled area a more complete, consistent finish. It can help keep everyday debris from settling in the joints, but it won’t correct poorly set tiles or protect an unsuitable substrate from water. For a basic overview of grout’s composition and uses, see Grout.
Tile material and manufacturer guidance affect compatibility. Don’t assume one grout is suitable for every tile or surface. Check the tile instructions and grout product guidance, particularly if the tile has a delicate finish or absorbs moisture readily. Choosing the right grout for tiles starts with confirming that the materials can be used together, then considering appearance and upkeep.
Grout lines versus flexible movement joints
Not every gap should be filled with grout. Corners, changes from wall to floor, and other areas subject to movement may need flexible sealant instead. A rigid grout joint in a location that moves can crack or separate, so the installer should follow the project details and each product’s instructions.
Before installation, confirm with your tiler where grout ends and sealant begins, which sealant is compatible with the tile and surrounding materials, and how it will be applied. Also clarify how waterproofing is addressed in the overall work scope. These details help set clear responsibilities; grout alone cannot prevent leaks.
Cement-Based, Epoxy, or Other Grout: Understand the Main Differences
Grout types differ in how they’re mixed, applied, cleaned and maintained. Cement-based grout is widely used, while epoxy grout may offer greater resistance to staining. Ready-to-use formulations are another option, but their properties vary. No type suits every tile and room, so choosing the right grout for tiles means checking the product instructions against the project conditions.
The Grout 101 guide offers further background on grout types and selection. Use any general guide as a starting point, then check the manufacturer’s current instructions for the specific product being considered.
| Type | Possible suitable use | Maintenance | Key caveat |
|---|---|---|---|
| Cement-based | Common tile installations, depending on tile and joint requirements | Some products may need sealing; follow product guidance | Compatibility and sealing needs vary by formulation |
| Epoxy | Projects where stain resistance is a priority and the product is suitable | Follow the product’s care instructions | Application and prompt cleanup can require care |
| Ready-to-use or other formulations | Only where the product instructions approve the intended tile and location | Varies by product | Don’t assume all formulations have the same performance or use limits |
When cement-based grout may suit the project
Cement-based grout is a familiar option for many tiled floors and walls, with different formulations for different joint widths and applications. Some types may need a sealer, while others have different care requirements. Ask the installer to confirm the grout is compatible with your tile, planned joint size and room conditions. Check the product instructions before deciding whether sealing is required.
When epoxy grout may be worth considering
Epoxy grout may be worth discussing for areas where resistance to staining is a priority. Performance depends on the specific formulation, so avoid treating a general claim as a guarantee. Application and cleanup can be less forgiving than with some cement-based products, and residue may be difficult to remove if the instructions aren’t followed. Confirm the product’s suitability, installation method and maintenance requirements with your tiler.
Before work begins, ask which grout type is proposed and why it suits the selected tile and location. Confirm who supplies it and whether application and cleanup are included in the tiling scope. For homeowners planning tiling and masonry works, agreeing on these details early helps keep material choices and responsibilities clear.
Match Tile Grout to the Room, Tile Material, and Joint Width
The same grout may not suit every tiled area in a home. A kitchen backsplash, a bathroom floor and a living-room wall face different levels of moisture, cleaning and everyday wear. For choosing the right grout for tiles, assess the room’s use alongside tile compatibility, the specified joint width and the maintenance you’re prepared to do.
Choose grout for wet areas and frequently cleaned surfaces
Bathrooms and kitchen splash zones may face regular moisture, while kitchen floors may need frequent cleaning to remove spills and food residue. Living areas might see less moisture but still need joints that suit foot traffic and routine care. Consider these factors separately: how often the surface is cleaned, how much water it encounters, and whether the grout product is approved for that location.
Grout selection alone doesn’t determine moisture performance. Ventilation, the waterproofing system beneath the tiles and the quality of installation also matter. Ask the installer to confirm the product’s application and curing instructions, including when the tiled area can be exposed to water or cleaned. Follow those instructions rather than assuming every grout cures in the same way.
Check tile type, grout joint, and colour together
Ceramic, porcelain and natural stone each need a compatibility check. Don’t assume that grout suitable for one tile will work for another. Natural stone can be sensitive to staining or colour transfer, so ask whether the grout is suitable and test it against a spare tile before committing. Check manufacturer guidance for both the tile and grout.
Joint width is also a specification, not just a design choice. Tile dimensions, edge finish and grout product requirements can affect which widths are suitable. Confirm the planned joint size with the tiler against the tile guidance and grout manufacturer’s instructions. A mismatch can affect application and the finished joint.
Test your shortlisted grout colour beside an actual tile sample under the room’s lighting. A contrasting shade makes the grid of joints more prominent; a closer match can make the tiled surface appear more continuous. View the sample in the space, since lighting can change how the colour reads.
Selection rule: Match the grout to the tile material, the room’s exposure and cleaning routine, and the joint specification. Then check the colour in place and confirm product and curing instructions before installation.

How to Choose Grout Colour and Avoid Common Selection Mistakes
Grout colour affects how clearly tile joints stand out, but a colour chart alone can’t predict the finished result. Screens, room lighting, tile texture and the grout’s appearance as it dries can all change how a shade looks. Use a simple approval process before installation, and record the choices so there’s less room for misunderstanding.
Should grout match or contrast with the tile?
A grout shade close to the tile colour can make the overall surface look more continuous. A lighter or darker shade creates a subtler difference, while a strong contrast makes each joint and the tile layout more visible. Choose based on the appearance you want, then consider cleaning expectations: a colour that shows less contrast with everyday residue may be easier to keep looking consistent, but colour alone doesn’t determine maintenance.
Always compare a physical grout sample with the actual tile, preferably in the room where it will be installed. Tile texture and lighting can affect the comparison. If possible, assess a sample after it has dried according to the manufacturer’s instructions. Choosing the right grout for tiles means approving a real-world sample, not relying only on a screen or a small printed swatch.
Mistakes to prevent before grout is applied
Don’t choose by colour first and check compatibility later. The grout still needs to suit the tile, joint width and room conditions. Nor should grout be treated as waterproofing or used in place of flexible sealant where the installation requires it. Confirm these responsibilities with your tiler before work begins.
Use this numbered process to make the decision in order:
- 1. Shortlist compatible grout. Check the tile and grout manufacturers’ guidance for the material, location and joint specification.
- 2. Compare colour options. Decide whether you want the joints to blend in or define the tile pattern.
- 3. Test a physical sample. View it beside the actual tile under the room’s lighting, and allow it to dry as directed.
- 4. Confirm the final details. Record the approved grout type and colour, joint width, work scope and care instructions.
Before installation, check: Is the exact grout colour approved? Is the joint width confirmed? Does the tiling scope state who supplies and applies the grout, and what cleanup involves? Have you received the product’s care instructions?
For planned tiling and masonry works, confirm these selections and responsibilities with your contractor before grout is applied.
Plan Grout Selection with Your Tiling Contractor Before Installation
Grout selection is one part of a tiling and masonry work package. Confirming the product, colour and joint details before installation helps keep expectations clear and gives the tiler a chance to check compatibility with the tile and room. It also avoids relying on a verbal colour choice once work is underway.
What to confirm in the tiling work scope
Ask for the grout choice and related tasks to be recorded in the agreed scope. Check who supplies the grout, and whether surface preparation, application, curing guidance and clean-up are included. If your tile choice or site conditions change, ask how that affects the agreed work before proceeding.
- Product: What grout type is proposed, and is it compatible with the tile, room and joint size?
- Finish: What colour has been approved, and what joint width will the tiler follow?
- Responsibilities: Who supplies the grout, and which preparation, application and clean-up tasks are included?
- Care: What curing, cleaning and ongoing maintenance instructions apply to this product?
Keep separate checks in view. The substrate condition, waterproofing and movement-joint details need their own assessment; grout selection doesn’t resolve them. Ask the contractor to explain how these items are addressed in the project and which work is included. Clear scope matters, especially if multiple trades or renovation tasks are involved.
Get clear advice before renovation work begins
Share the tile specifications or sample, the room where it will be installed, and your priorities for cleaning and appearance. That gives the contractor useful context for discussing product compatibility, joint requirements and maintenance. If you’re planning a wider flat renovation, consult an HDB renovation guide as part of your preparation and confirm the relevant project requirements before work starts.
Choosing the right grout for tiles is easier when the decisions are documented before installation. Review the final product type, colour, joint specification, supply responsibility and care instructions with your tiler. A direct-contractor arrangement can also make it easier to clarify who is responsible for each item in the agreed scope.
If you’re planning tiling as part of a renovation, discuss your renovation requirements and clarify the tiling and masonry work scope before work begins.
Make Your Grout Decisions Before Tiling Starts
Choosing the right grout for tiles means looking beyond the colour chart. Match the grout to the tile material, room conditions and specified joint width, then weigh installation and care requirements. Approve a sample beside the actual tile, and confirm the product, colour and maintenance instructions with your tiler.
Keep responsibilities clear, too. Grout does not replace waterproofing or flexible sealant where the installation requires it. Ask who supplies the grout and which preparation, application and clean-up tasks are included in the tiling scope.
Direct Renovation Contractor Singapore provides tiling and masonry works as part of renovation projects. Its direct-contractor model focuses on clear work scopes and transparent pricing, helping homeowners clarify responsibilities before work begins. If you’re planning tiled areas as part of a renovation, discuss your tiling and renovation requirements.
A few practical decisions made early can help you move ahead with a clearer plan for your tiled space.
Frequently Asked Questions
What is the best grout to use for floor tiles?
The best grout depends on the tile, joint width, room conditions and product instructions. Cement-based grout is commonly used for floors, while epoxy may suit some areas where stain resistance is a priority. Check that the selected grout is approved for the tile and intended use, and ask the installer about application and care. There isn’t one grout type that’s right for every floor.
Is epoxy grout better than cement grout?
Epoxy grout isn’t automatically better than cement grout. Some epoxy formulations offer strong stain resistance, but application and cleanup may require extra care. Cement-based grout is a common option, though sealing needs vary by product. Compare the specific products against your tile, joint size, room and maintenance preferences. Ask the tiler to confirm suitability and explain the installation and care requirements before you decide.
Can I use the same grout for bathroom and kitchen tiles?
Possibly, but only if the grout manufacturer approves it for both locations and the tiles and joints are compatible. Bathrooms may have more frequent moisture exposure, while kitchen floors and splash zones may need regular cleaning for spills and residue. Check product instructions for each application, including curing and maintenance. Also confirm waterproofing and movement-joint details separately, since grout alone doesn’t address them.
How do I choose the right grout colour for tiles?
Start by selecting grout that’s compatible with the tile and joint, then compare colours. A shade close to the tile can make the surface look more continuous, while a contrasting colour makes the joint pattern stand out. Test a physical sample beside the actual tile under the room’s lighting. Screens, tile texture and drying can affect how colour appears, so approve the sample before installation.
Does grout make tiled bathroom floors waterproof?
No. Grout fills the joints between tiles, but it doesn’t replace a waterproofing system beneath the tiled floor. Water resistance varies by grout product, and water can still pass through joints or around edges. Ask the contractor how waterproofing is handled and confirm the substrate and installation details separately. Ventilation and workmanship also affect moisture performance. Follow the grout manufacturer’s curing instructions before exposing the area to water.
Do I need to seal cement-based grout?
It depends on the specific cement-based grout. Some products require sealing, while others have different instructions, so don’t assume every cement grout needs the same treatment. Check the manufacturer’s guidance for sealing, timing, cleaning and ongoing care. Before installation, ask your tiler which product is proposed and whether sealing is part of the agreed work scope. Use the product instructions to guide future maintenance.
How wide should grout lines be between tiles?
There isn’t one joint width that suits every tile. The tile’s dimensions and edge finish, along with the grout manufacturer’s specifications, affect the suitable width. Confirm the planned joint size with your tiler before installation and check it against both sets of product guidance. Don’t select a narrow joint for appearance alone if the tile or grout instructions call for something different. Record the agreed size in the work scope.