
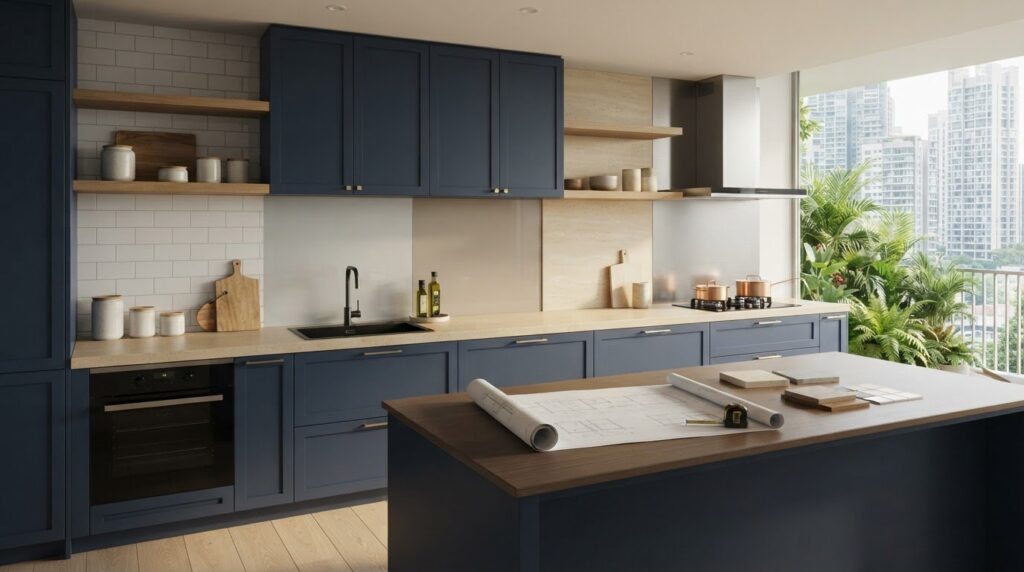
The most seamless backsplash isn’t automatically the best choice for every kitchen. When comparing kitchen backsplash options singapore homeowners can choose from, consider where you cook, how much cleaning you’re willing to do, and how the surface works with your cabinets and countertop.
Grease on the wall and grime collecting in grout lines are practical concerns. Tiled finishes have a different upkeep routine from smooth glass or stainless steel panels, and the amount of wall to cover affects how each option suits your layout. Choosing by appearance alone can leave you with a surface that’s harder to maintain than expected.
This guide compares common backsplash materials by upkeep, cooking habits and kitchen style. You’ll learn how to assess splash zones, grout versus a seamless finish, and the details to plan before installation. Coordinating the backsplash with cabinet carpentry, countertop choices and adjoining works early can help you visualise the finished kitchen. Technical drawings can support those decisions before work starts.
Key Takeaways
- Compare tiles, glass, solid surfaces, stone and steel by appearance, cleaning needs and practical trade-offs.
- Use your cooking frequency, cleaning preferences and renovation scope to narrow down kitchen backsplash options singapore homeowners can consider.
- Plan coverage and measurements around countertop height, cabinet edges, sockets and corners before installation.
- Coordinate the selected finish with cabinetry, counters and tiling works so the renovation scope is clear from the start.
- Use drawings to visualise how the backsplash fits into the kitchen before work begins.
Kitchen backsplash options in Singapore: what the surface does and why it matters
A backsplash is the finished wall surface behind a kitchen worktop. It shields the wall from splashes and residue where food is prepared, washed or cooked. In short, a kitchen backsplash is a finished wall surface that protects the area behind worktops from everyday cooking and cleaning mess. For a general overview of its purpose and common materials, see What is a Backsplash?
Different parts of the wall face different kinds of daily wear. Cooking can leave grease and food splashes near the hob; washing creates water splashes around the sink; and steam or routine wiping can affect the surface over time. A suitable finish is generally easier to maintain than an untreated wall, but upkeep still depends on the material, its finish and how it’s installed.
Coverage can vary by kitchen. You might protect only the most exposed section, continue the finish along a full worktop wall, or plan different coverage for separate work zones. The layout, cabinet positions and renovation scope all affect the decision. Comparing kitchen backsplash options singapore homeowners may choose is about more than appearance: weigh protection, cleaning effort, visual preference and how the work fits into the wider renovation.
Which kitchen areas need a backsplash?
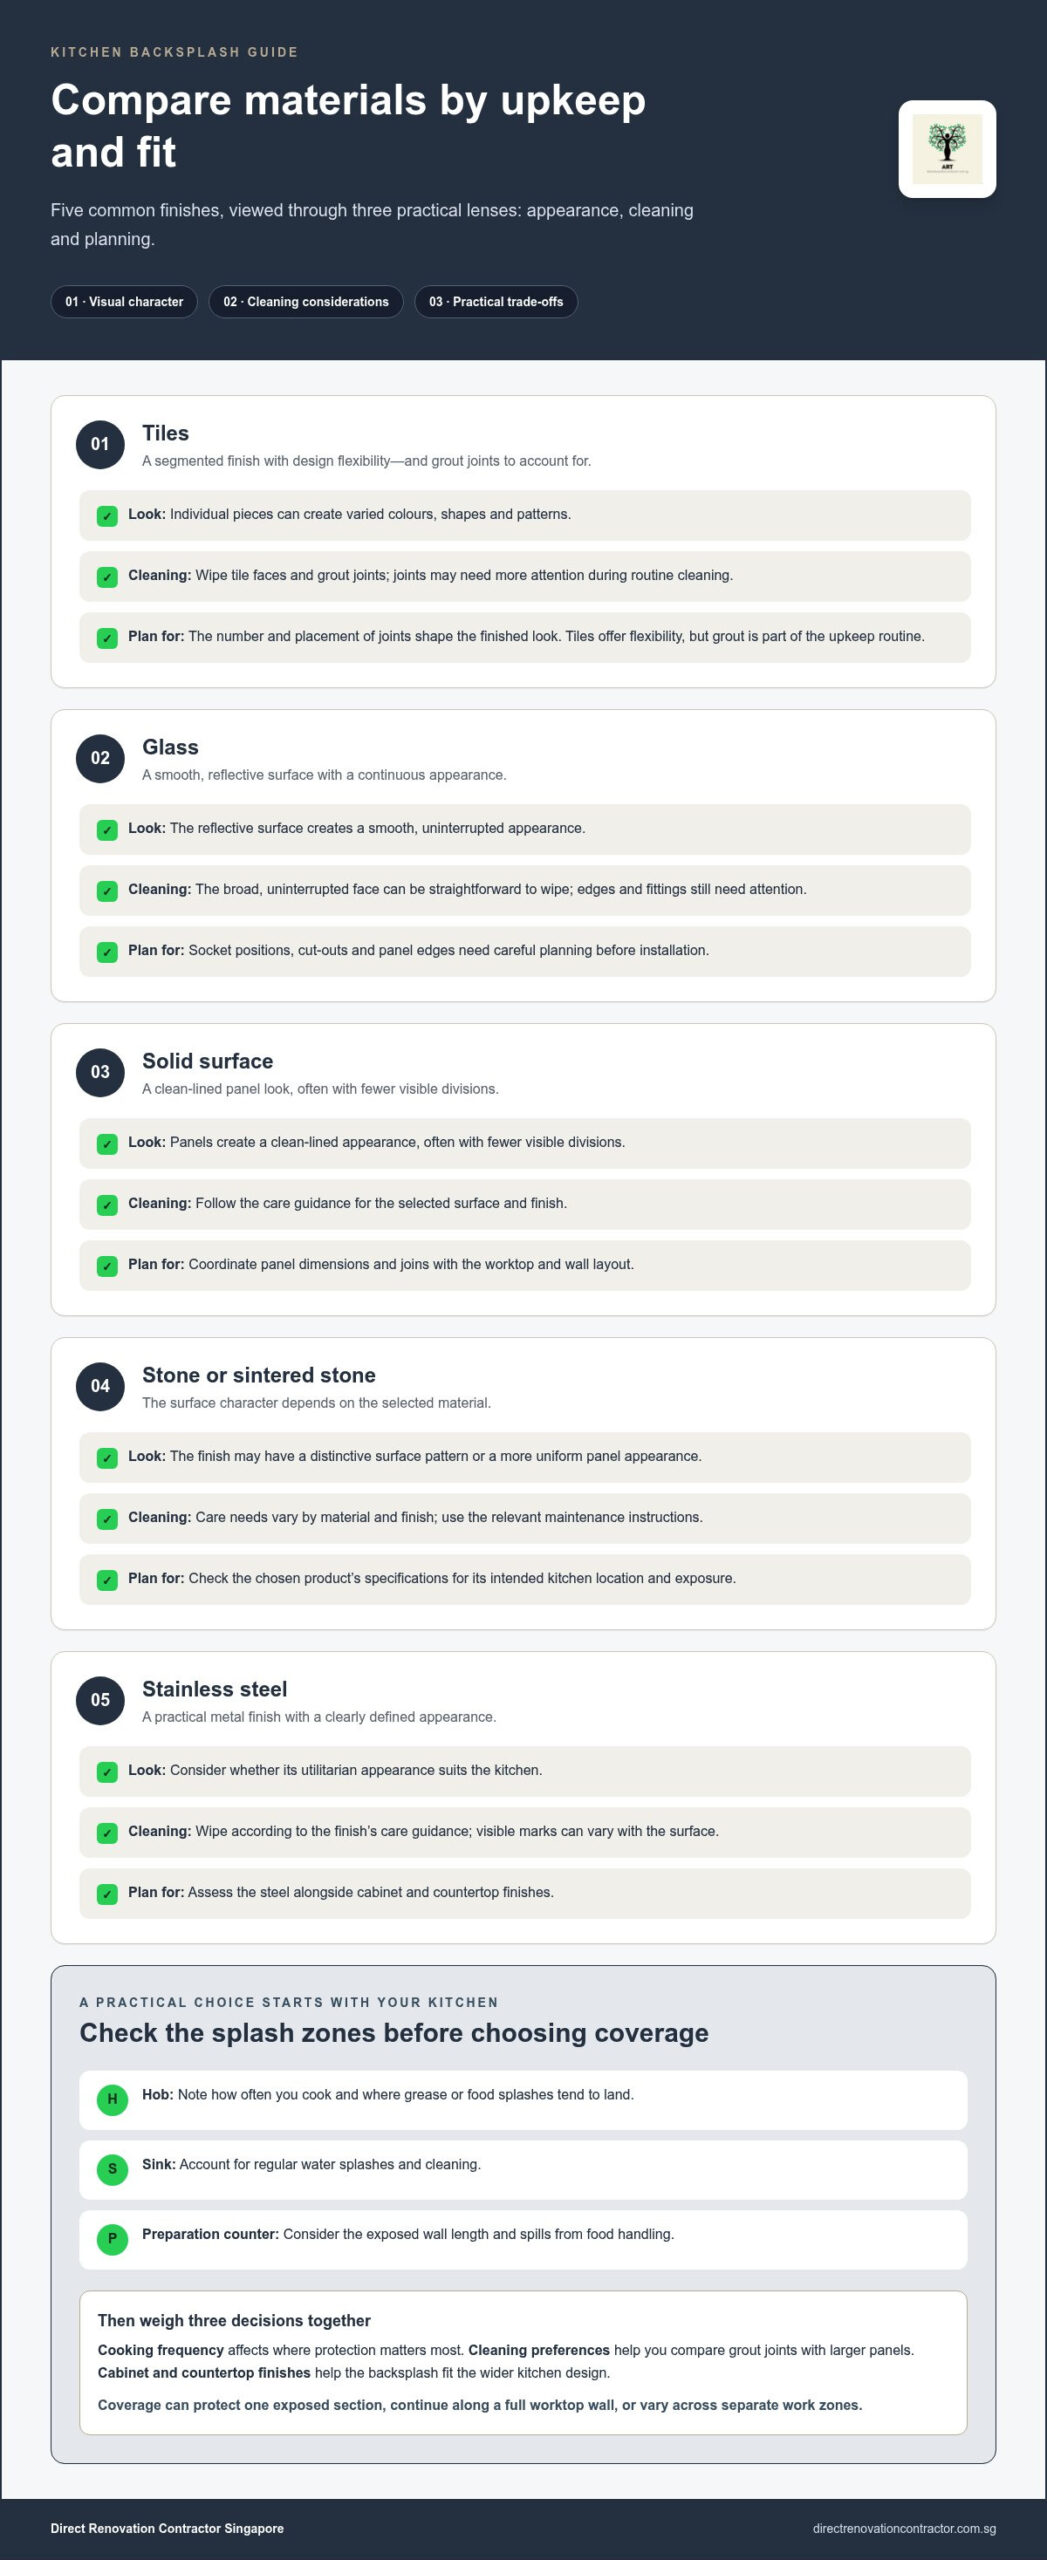
Start by mapping how you use the kitchen. The hob, sink and food-preparation counter are common locations, but exposure varies. Cooking areas may collect grease, washing areas face water splashes, and preparation surfaces may see spills from ingredients or food. Notice where you stand, place utensils and wipe the wall during a typical day. This simple task map helps you decide whether to cover one section or connect several areas.
- Behind the hob: Consider how often you cook and where splashes tend to land.
- Behind the sink: Account for regular water splashes and cleaning.
- Along preparation counters: Look at the length of wall exposed during chopping and food handling.
How a backsplash affects kitchen maintenance and appearance
A finished surface can make routine wipe-downs easier, especially in areas that see frequent splashes. But maintenance isn’t determined by material alone. Texture, joins and coverage affect where residue collects and how much wall you need to clean. Consider your habits: a household that cooks often may prioritise an easy-to-wipe finish, while another may put more weight on texture or visual effect.
Appearance matters too. Colour can connect the wall to the countertop or cabinets, while texture changes how the finish looks under kitchen lighting. A small backsplash area can act as an accent; extending the finish across a longer wall makes it more prominent. Decide what you want the wall to do visually, then compare materials against your cleaning preferences and renovation plan rather than choosing by trend alone.
Compare kitchen backsplash materials: tiles, glass, solid surfaces, stone and steel
Each material gives the wall a different look and upkeep routine. Tiles create a pattern from individual pieces and grout joints; larger panels create a more continuous appearance. Don’t compare materials only by which seems toughest. Consider how each looks beside your cabinets and counter, where it will be installed, and what cleaning routine you’re comfortable with. This table is a practical starting point for comparing kitchen backsplash options singapore homeowners may encounter.
| Material | Visual character | Cleaning considerations | Practical trade-offs |
|---|---|---|---|
| Tiles | Segmented finish with varied colours, shapes and patterns | Clean the tile faces and grout joints; joints may need more attention during routine wipe-downs. | Offers design flexibility, but the number and placement of joints affect the overall look. |
| Glass | Smooth, continuous appearance with a reflective surface | A broad, uninterrupted face can be straightforward to wipe; edges and fittings still need attention. | Socket positions, cut-outs and panel edges need careful planning before installation. |
| Solid surface | Clean-lined panel appearance, often with fewer visible divisions | Follow the care guidance for the selected surface and finish. | Coordinate panel dimensions and joins with the worktop and wall layout. |
| Stone or sintered stone | Distinctive surface pattern or a more uniform panel look, depending on the material | Care needs vary by material and finish, so use the relevant maintenance instructions. | Assess the chosen product’s specifications for its intended kitchen location and exposure. |
| Stainless steel | Practical, metal finish with a clearly defined appearance | Wipe according to the finish’s care guidance; visible marks can vary with the surface. | Its utilitarian look may suit some kitchens better than others, so consider it alongside cabinet and counter finishes. |
Grout upkeep is a key difference between tiles and seamless panels: tiles have joints to clean, while larger panels reduce the number of visible breaks. Panels still need cleaning, and tiles can be practical. The difference is what you’ll be wiping and how the finished wall looks.
What to know about tile and glass backsplashes
Tiles make it easier to create a detailed pattern or add smaller colour accents, but grout adds joints across the surface. Glass gives a smoother visual field. Plan its panel layout around power sockets, corners and exposed edges so the finished piece fits the wall and nearby fittings. For claims about strength or heat performance, refer to the selected material’s specifications for its intended location.
When solid surfaces, stone or stainless steel may suit
Solid-surface and stone panels can create a cleaner-lined appearance than smaller tiles, while stainless steel gives the wall a functional, metal finish. Assess stone and sintered stone using the specific product details and planned cooking-zone exposure, not the material name alone. Compare samples with your counter and cabinet finishes in the kitchen’s lighting.
Once you’ve narrowed down the material, coordinate its dimensions and finish with the surrounding kitchen works. Kitchen renovation coordination can bring backsplash decisions together with cabinet carpentry and tiling in a clear project scope.
How to choose backsplash options for your cooking habits and kitchen design
Choose a backsplash around how you use the kitchen, not just the finish that looks most expensive in a sample display. A premium-looking surface may not suit your cleaning routine, layout or renovation scope. Use this checklist to narrow down kitchen backsplash options singapore homeowners can consider, then compare shortlisted finishes with your cabinets and countertop.
- Cooking frequency: How often do you cook, and which wall areas regularly get splashed or exposed to residue?
- Cleaning habits: Are you comfortable wiping grout joints, or would you rather have fewer visible joins? Do visible marks bother you?
- Visual preference: Should the backsplash blend with the cabinets and counter, or create a clear contrast?
- Renovation scope: Are you updating the backsplash alone, or coordinating it with new cabinets, counters or other kitchen works?
Your answers help set practical priorities before you settle on a colour or material. They also make it easier to describe what should be included in the renovation plan.
Match the material to cooking frequency and cleaning habits
If you cook frequently or often prepare food at the counter, focus on the areas that see the most splashes and how readily you’ll wipe them down. A household that cooks lightly may give more weight to appearance or limited coverage. Think honestly about grout: if you’d rather not clean multiple joints, that preference can guide your shortlist. If you don’t mind joints, tile patterns remain an option.
Visible marks and care needs can differ with a surface’s colour, texture and finish. Heat, stains and moisture also depend on the specific material and product, so don’t assume a general material label guarantees suitability for every location. Review the manufacturer’s care and use instructions for your chosen finish, particularly behind the hob or sink.
Coordinate backsplash colour, texture and countertop
Compare the backsplash with the countertop and cabinet fronts. A complementary colour or similar texture can create a connected, quieter finish. A deliberate contrast can define the worktop wall and add a focal point, but strong patterns across several surfaces may compete for attention. In a compact kitchen, a lighter or simpler finish may help the wall feel less visually busy; the effect depends on the layout, lighting and neighbouring colours.
Don’t judge a finish on its own. View material samples beside the actual or planned cabinet and countertop colours, and consider them under the kitchen’s lighting. A surface that looks neutral in a showroom can read differently next to a warm-toned cabinet or patterned counter. If the renovation includes cabinetry or worktop changes, choose these finishes together so the backsplash supports the overall scheme rather than becoming an afterthought.
The best fit meets your everyday needs and works with the renovation plan. A costly or dramatic finish isn’t automatically more practical. Weigh upkeep, cooking habits and coordination before making your final selection.
Plan backsplash measurements, installation sequence and finishing details
Translate your backsplash decision into clear dimensions and work details before materials are fitted. First choose the coverage area and material, then map the wall against the countertop, cabinets and fittings. Whether you choose tiles, glass or another panel finish, plan edge and joint details to suit the material and wider kitchen scope.
A practical planning sequence is:
- Set the coverage: Mark the wall sections to protect, including the area behind the hob, sink and preparation counter.
- Coordinate the surrounding finishes: Note the countertop height, cabinet ends and any exposed wall that will remain visible.
- Record fittings and openings: Mark socket positions, switches and other cut-outs before the material is measured or prepared.
- Confirm the installation order: Coordinate the backsplash with cabinet, countertop, electrical and tiling works, based on the chosen material and project scope.
- Specify the finish: Identify how exposed edges, corners and material joints will be completed.
Measure coverage and resolve sockets, corners and edges
Measure the intended backsplash area against the actual counter and cabinet layout. Include counter height, the underside and ends of cabinets, corners, and narrow wall sections beside appliances. A drawing that shows these boundaries helps distinguish the surface to be covered from the wall that will remain exposed.
Mark socket locations early, especially for glass or larger panels that may need accurately planned cut-outs. Edge details matter too. A visible end can be finished to look deliberate, while a tight corner or gap behind a fitting can affect cleaning access. Include these details in the work scope rather than leaving them to be resolved during installation.
Coordinate the backsplash with countertop and renovation works
The countertop can be a useful sequencing reference, but there isn’t one installation order for every kitchen. The selected backsplash material, cabinet layout and work scope determine when measurement and fitting should take place. For example, a project involving new cabinets, a counter and electrical changes needs those elements coordinated so the backsplash dimensions account for their final positions.
Finishing depends on the surface too. Tiled work may involve grout at the joints; other materials have their own joint or edge treatment. Specify the finish for your chosen material rather than assuming every backsplash needs the same grout or sealant detail. In Singapore, include these decisions in the broader renovation plan, whether the project is a BTO or resale kitchen. The HDB renovation guide offers wider context for planning works in an HDB home.
Clear drawings help you visualise how the backsplash lines up with cabinets, counters and sockets before work begins. For help coordinating these kitchen renovation details into a defined scope, plan your kitchen renovation works.
Bring your Singapore kitchen backsplash choice into a clear renovation scope
A material choice is easier to act on when it’s recorded alongside the kitchen elements it must fit. The backsplash meets the countertop and cabinets, and sometimes tiled wall sections, so decisions about one can affect the others. Put the selected finish, coverage and adjoining work into a shared scope before renovation starts. This clarifies which surfaces are included and how their edges should meet.
Coordinate backsplash and kitchen carpentry decisions
Cabinet layout helps define the backsplash’s top edge, while the countertop position sets its lower boundary. If cabinets stop short of a corner or leave a section of wall exposed, show that on the plan too. Reviewing these details alongside the kitchen cabinet carpentry scope helps align coverage with the finished layout. For more context on planning cabinetry, see this custom carpentry guide.
3D drawings can help you visualise how a backsplash colour and texture sit beside cabinet fronts and the counter before work begins. They also make it easier to discuss whether a finish should blend in or stand out, and where the material ends at a cabinet edge or corner. Use the drawing as a coordination tool, then define the actual material and coverage in the work scope.
Move from material choice to a workable project plan
Before work starts, bring the key decisions together in one place. A useful scope records:
- Material and finish: State the selected surface and its intended look.
- Coverage: Mark the wall sections included, with boundaries at counters, cabinets and exposed ends.
- Fittings and details: Note sockets, cut-outs, corners, edges and the joint finish relevant to that material.
- Related work: Identify how the backsplash connects with cabinetry, countertop and tiling works.
Clear drawings and a defined scope give the renovation team a practical reference for coordinating these decisions. They also help you review the planned result before installation rather than relying on memory or separate conversations. For Singapore homeowners comparing kitchen backsplash options singapore, this step turns a shortlist into a decision that fits the complete kitchen plan.
Direct coordination can keep related renovation works within a clear sequence without an interior-designer intermediary. DIY-friendly support, including 3D drawings and a curated list of direct contractors and material suppliers, helps homeowners organise the wider project. Direct Renovation Contractor Singapore’s stated mission is to help homeowners save 20 to 30% by eliminating middleman fees, though individual project costs and savings depend on the scope.
For an overview of direct renovation support, explore direct renovation support.
Turn your backsplash decision into a renovation-ready plan
Turn your preferred finish into a clear brief rather than comparing materials indefinitely. Write down what you’ve decided, what still needs a choice and how the backsplash should fit the kitchen as a whole. This gives everyone involved a shared reference and helps prevent small details from getting lost as renovation decisions move forward.
For kitchen backsplash options singapore homeowners can put into practice, ask whether the selection suits daily use and can be carried through the renovation scope clearly. Direct project coordination can bring cabinet carpentry and tiling works together, while 3D drawings and DIY-friendly planning support make choices easier to visualise.
Direct Renovation Contractor Singapore works with homeowners without an interior-designer middleman. If you’re ready to move from a material choice to a practical renovation plan, plan your kitchen renovation with direct, practical support.
A well-planned kitchen doesn’t need complicated decisions. Start with a clear brief, then build the rest of the renovation around it with confidence.
Frequently Asked Questions
What is the easiest kitchen backsplash material to clean?
A smooth panel with few joints, such as glass, is often straightforward to wipe because there are fewer grooves for residue to collect in. Cleaning still depends on the surface finish and the marks it shows. A glossy finish, for example, may make splashes easy to spot, so wiping them promptly can help keep the wall looking tidy. Follow the care instructions for the specific material you choose.
Are tiles or glass better for a kitchen backsplash?
Neither is automatically better; the right choice depends on the look and upkeep you prefer. Tiles provide separate pieces that can create a pattern, while glass gives a more continuous appearance. When comparing kitchen backsplash options singapore households commonly consider, think about the details around corners and fittings, as well as how you feel about cleaning joints. Choose based on your kitchen layout and daily routine.
Can a kitchen backsplash be installed after the countertop?
Yes, a backsplash can be installed after the countertop, and measuring against the fitted counter can help define the lower edge. The sequence should still suit the selected material and the rest of the work. If cabinets or electrical fittings are also changing, their final positions affect the backsplash plan. Set the order with the full renovation scope in view rather than treating the countertop as a universal rule.
Is sintered stone suitable for a kitchen backsplash in Singapore?
Sintered stone can be considered for a kitchen backsplash, but suitability depends on the specific product and where it will be fitted. For a wall behind a hob, review the manufacturer’s guidance for the intended use and care requirements instead of relying on broad claims about the material category. Also consider how its pattern and finish sit beside your countertop, since large surfaces can make that pairing especially noticeable.
Can a backsplash be installed around kitchen power sockets?
Yes, a backsplash can be planned around sockets, but record their exact positions before the material is measured or cut. This is especially useful for a large panel, where a misplaced opening can disrupt the finish. Include switches and other wall fittings in the same plan. Coordinate any socket relocation or electrical changes as part of the renovation scope, not as an afterthought.
Should a kitchen backsplash match the countertop?
No, it doesn’t have to match exactly. A backsplash can share a colour or undertone with the counter for a coordinated look, or use a contrasting finish to define the wall as a separate feature. If the countertop has a pronounced pattern, for example, a simpler backsplash may keep the surfaces from competing. Compare the actual samples together, because colours and textures can look different side by side.
Can a backsplash cover the wall all the way to the ceiling?
Yes, a backsplash can extend to the ceiling if that coverage suits the kitchen layout and renovation plan. A full-height finish may work where cabinets don’t cover the wall, such as behind an open shelf or at a feature section. Before deciding, account for upper cabinets, rangehood placement, sockets and the material’s panel or tile layout. Mark the intended boundary clearly so the work scope shows exactly which wall areas are included.